In last blog, we talked about basic strokes and now lets move on to next step.This step is drawing shape and shade in it.Did you buy any Shading Book(shapes)? Yes? then its great! But if no, then don't worry you just should be knowing how to draw shape and then you can shade in it.From now we are turning alittle bit towards realistic pencil shading.
You need:
Pencil set, Paper Eraser and Sharpener.
 Our shade basically depends on the angle of our object to light.I have a picture which will help you understand what I am talking about.You can see at different angle shaded areas gets different.So starting from here firstly start drawing a shape like circle or square with very light border. Then Assume that light is in top left corner.Start light shading in whole shape.Keeping the area lighter which is faced towards light,the area hidden to light shade it darker. This show reflection of light on object and makes it look like real. Then give it a darker border so it creates a feeling of actual object.Make as many shapes you can and shade it. I know first you aren't going to make it perfect nobody can in first try,but remember the saying," Practise makes a man perfect".Keep practising on simple shapes (circle, square, rectangle, or triangle) or objects(boxes,egg, vegetables or fruits)chose whatever you prefer.Then shade in them keeping light from any of the corner or side.We will next talk about next step that is making more complicated shapes and shade them.
I have some of my drawings below here which will give you some idea to what to draw at this stage:
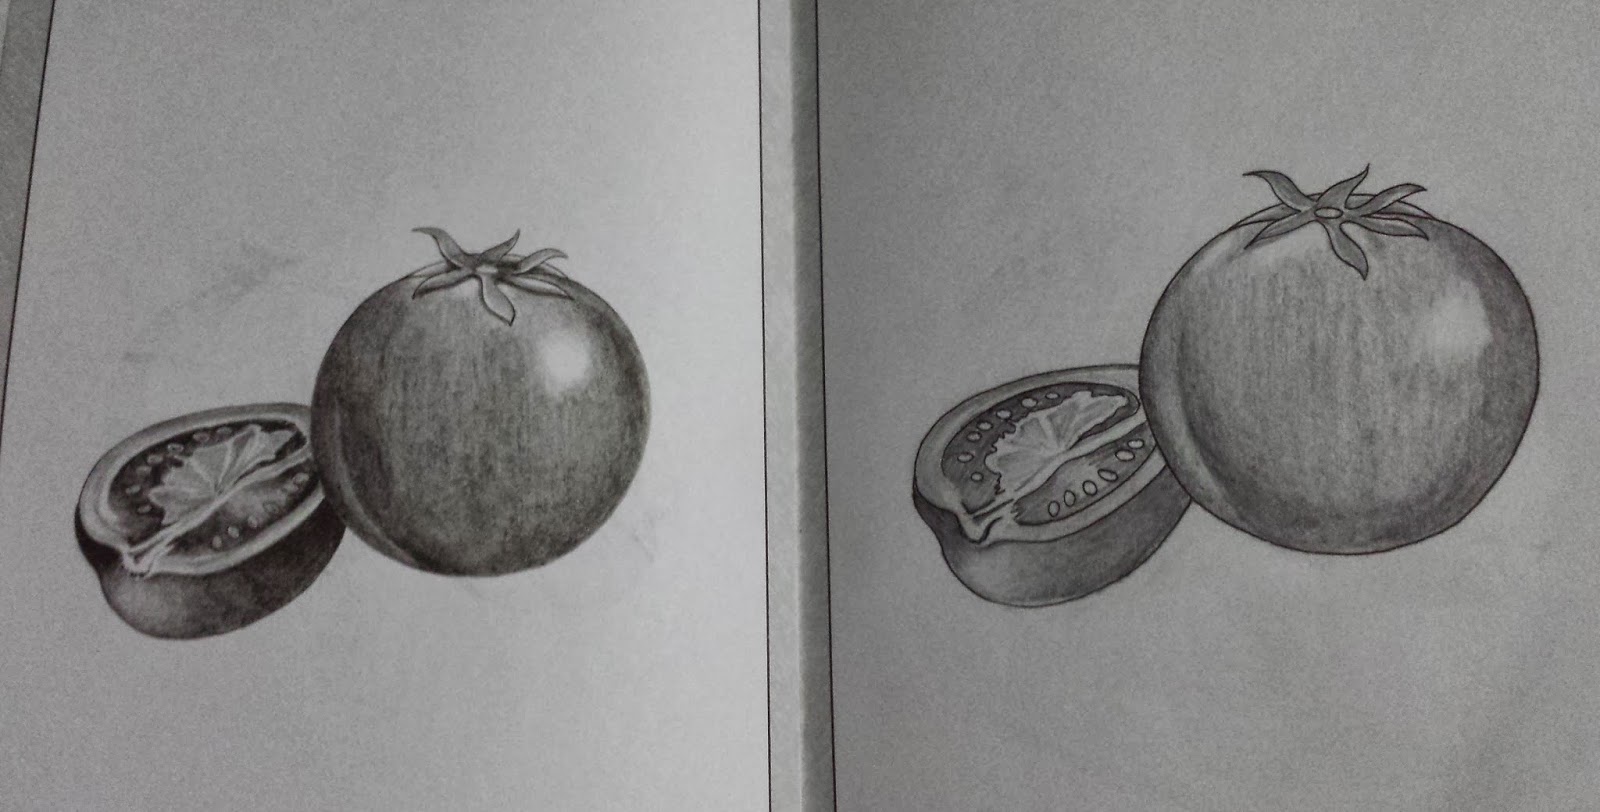 First simple shapes and shades
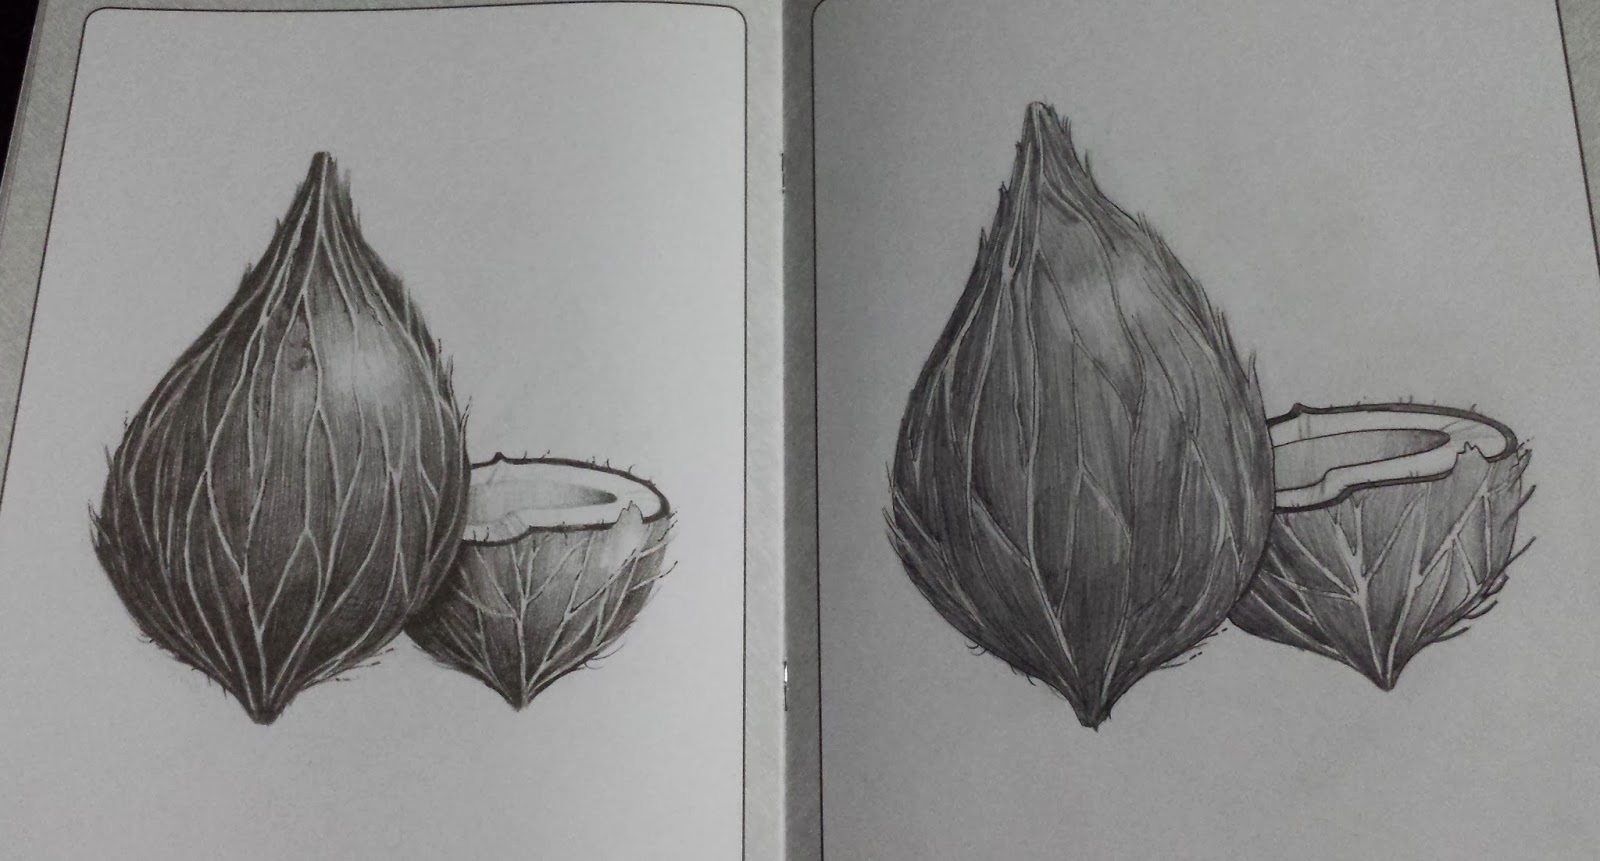 And next time we will learn a bit complicated
I will always provide you some of my drawings in every blog.Share your ideas, thoughts and concerns with me.
You need:
Pencil set, Paper Eraser and Sharpener.
I have some of my drawings below here which will give you some idea to what to draw at this stage:
First simple shapes and shades And next time we will learn a bit complicatedI will always provide you some of my drawings in every blog.Share your ideas, thoughts and concerns with me.
Please could you share a video on how to draw these
ReplyDeleteWow!
ReplyDelete